
I've been doing a lot of 3D printing lately but in the background I'm working on new books. One of them is an update to my Beginner's Guide to Embedded C Programming series. In the first series, I used MPLAB, HI-TECH C Compiler, PICkit 2 programmer and a PIC16F690. All those have been replaced. MPLAB X, XC8 Compiler, PICkit 3 programmer and the PIC16F1xxx family of enhanced mid-range devices. Something else changed recently which has me delaying my book, MPLAB Code Configurator (MCC).
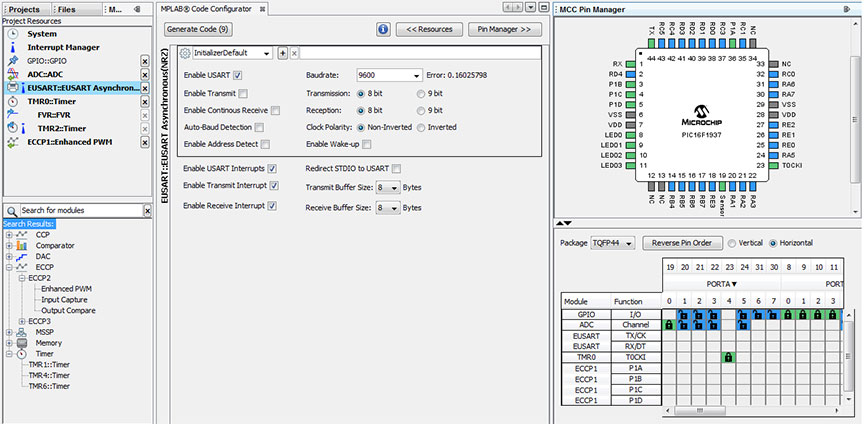
MCC was in beta for a while but is now released and already on version 2.1, and it is awesome. With a few clicks of the mouse you can build a whole project of code (see it in the video below). Each peripheral is reduced to a set of check boxes or drop down menus. I/O can be configured with a GUI version of the chip. Even the main.c file can be generated. And the best part.....
.....all the code generated includes a library of functions for each peripheral written in XC8 code. Even I/O has its own set of functions such as:
RB0_SetHigh()
RB0_SetLow()
RB0_Toggle()
RB0_GetValue()
RB0_SetDigitalInput()
RB0_SetDigitalOutput()
RB0_SetPullup()
RB0_ResetPullup()
RB0_SetAnalogMode()
RB0_SetDigitalMode()
And these are just the I/O functions for the RB0 pin. And the function code is open source so you can see how its done. Great for learning.
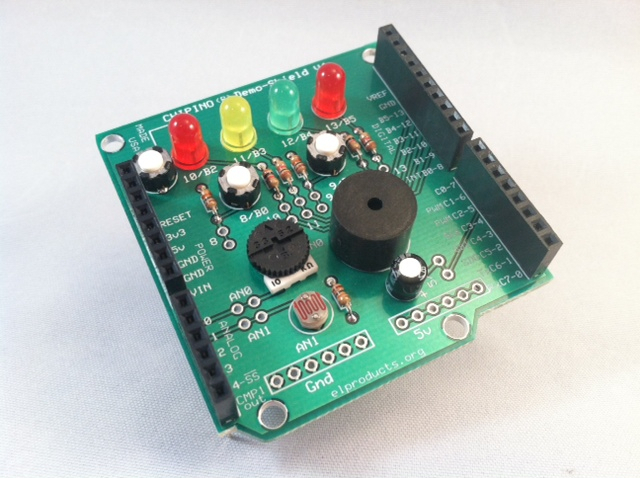
It does the same for SPI, I2C, Timers, etc. You could take a module like the CHIPINO with fixed pinouts, install a PIC16F1936 (instead of PIC16F886), setup all the peripherals and connections to the I/O and then build the code. You'll have a main.c file with configurations set and ready for your custom code along with a library of functions for all the peripherals in the device.
You basically just created your own Arduino style module from a CHIPINO. And you have debug capability through the PICkit 3, full access to the configuration to run slower speeds or faster speeds. And when you are done, unplug the PIC16F1936 and do it again for some other blank 28 pin PIC with different features. And because you don't need a custom bootloader device, you can use any PIC supported by MCC. And that list is growing with each release.
So stay tuned for more as I work this into my new series of books. Writing C code for PICs just got so easy. I cannot say that enough.
 RSS Feed
