Electronic Products
Find us here:
  • Books
    • Embedded C Books >
      • cbookfiles
      • cbook2files
      • cbook3files
    • BASIC Books >
      • Programming PICs in BASIC_vol1
      • PICBasic Book Support
      • Basic Atom Book Support
    • Other Books >
      • Arduino Book
      • chipkitbookfiles
  • Chuck's Blog
    • Blog Posts Archive
    • Disclaimer
  • YouTube Channel
  • About Chuck
    • About Chuck
    • Stock Car Racing
  • 3D Printing
    • Fabrikator Mini
  • Getting Started with PICs
    • BASIC Programming
    • C Programming >
      • C Compilers
  • Build Your Own PICKit 2
    • PICkit 2 Starter Kit
  • CHIPINO
    • Shields
  • CHIPAXE Breadboard Modules
  • Understanding Hex Files
  • chipKIT
  • Newsletter Archive
  • Contact
  • Retired Designs
    • BasicBoard
    • Ultimate OEM
    • Maximite BasicBox
    • Maximino
  • Downloads
  • Kickstarter Projects
    • Demo-Shield
  • Great Cow Basic Site
  • Buy Hardware
  • Links I Recommend

Davinci 3D Software Issues

6/28/2014

2 Comments

 
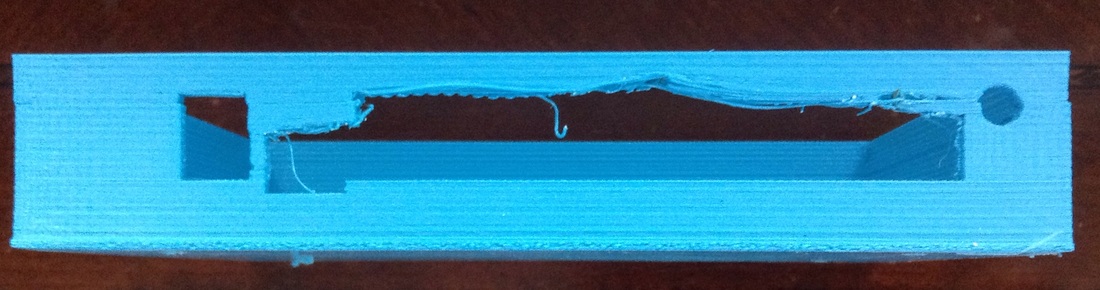
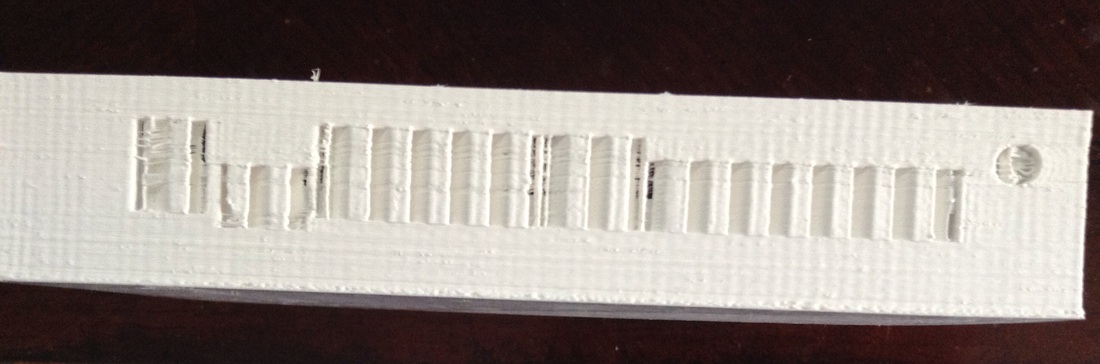
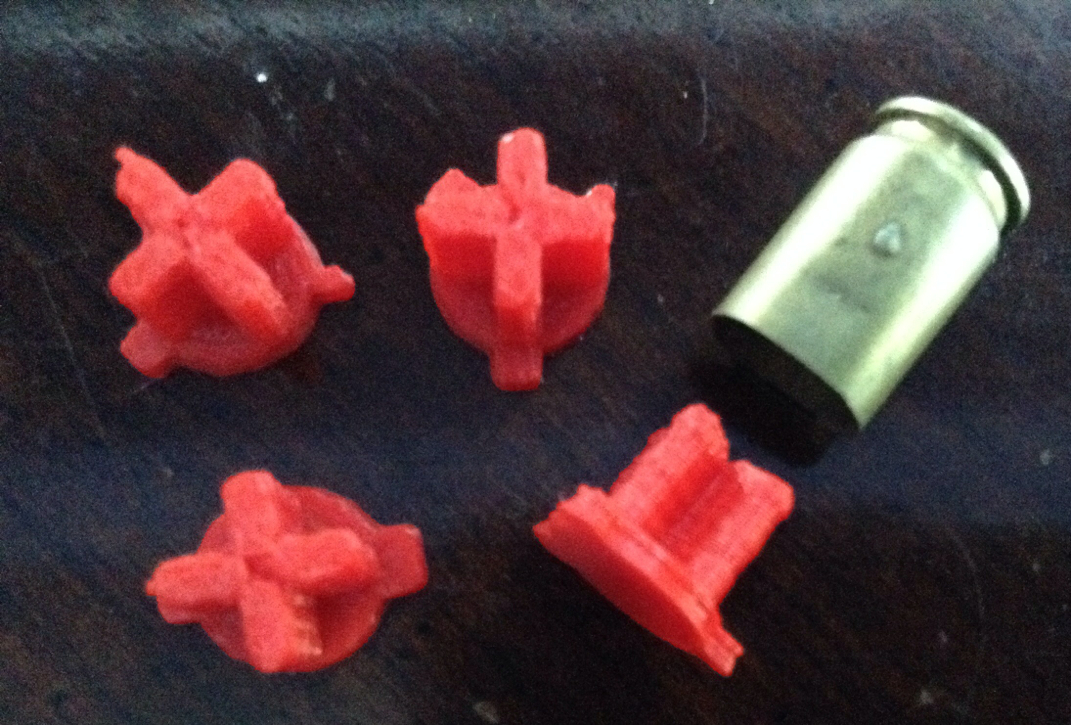
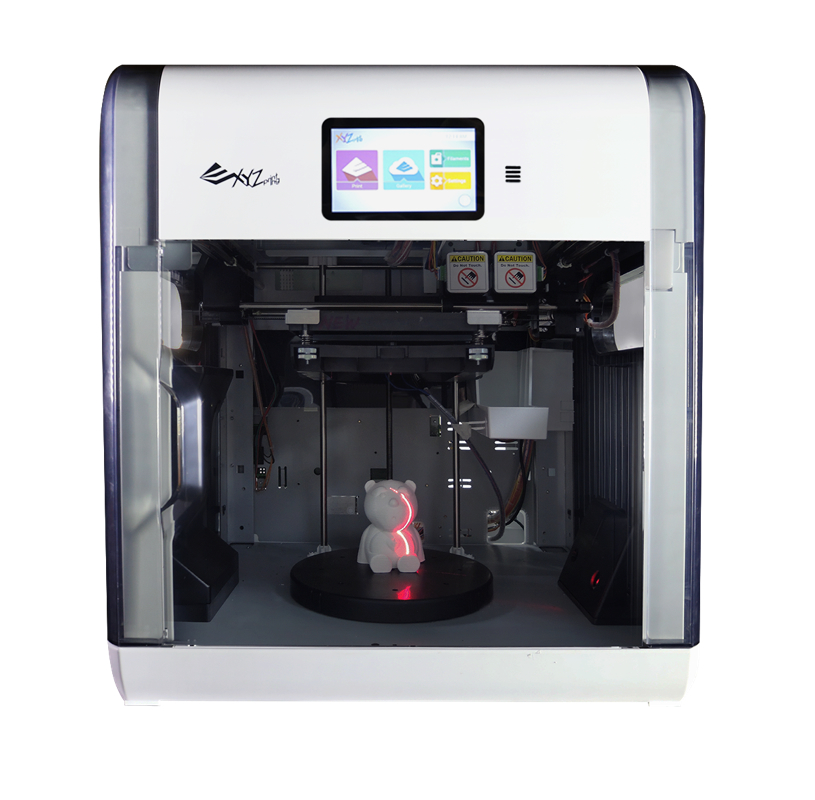
My Davini 3D printer from XYZ Printing is back in action printing all kinds of products. I ran a bunch of vertical blind valence clips and noticed the print bed was off a little. I adjusted the bed while the print was going and you can see in the picture below the filament plastic is laid down almost perfect with a slight flatness but rounded on top. And its sticking to the heated bed without lifting. This indicates the perfect bed to nozzle clearance based on my experience.
Picture
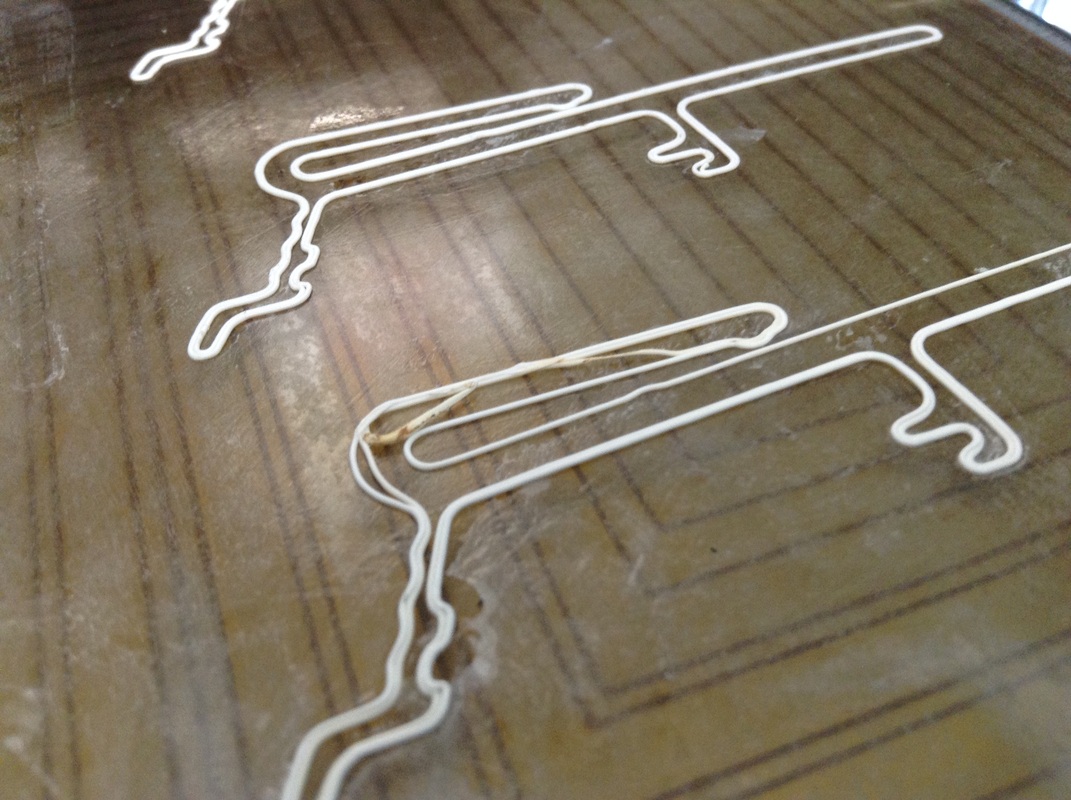
Also note though that the first print at the front of the picture has some out of place discolored plastic in its first layer. Typically the printer runs a test strip on the side to start the plastic flowing and then starts the print. But I've updated the XYZ Printing Software and now it no longer is creating that test strip. 

I have been running the software on a small NetBook Computer running XP but recently moved the printer to my office where I have a iMac running Maverick 10.9.3 operating system. The software from XYZ Printing was locking up so an email to the tech support got a quick response and a patch version to try. It improved but still had some issues that they are working on. I hope to get a new patch soon. 

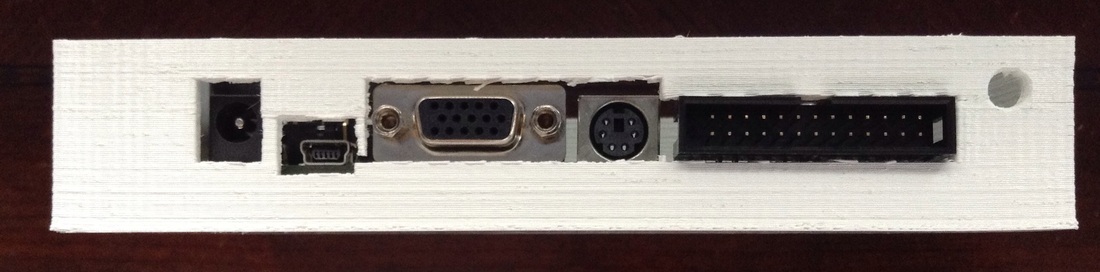
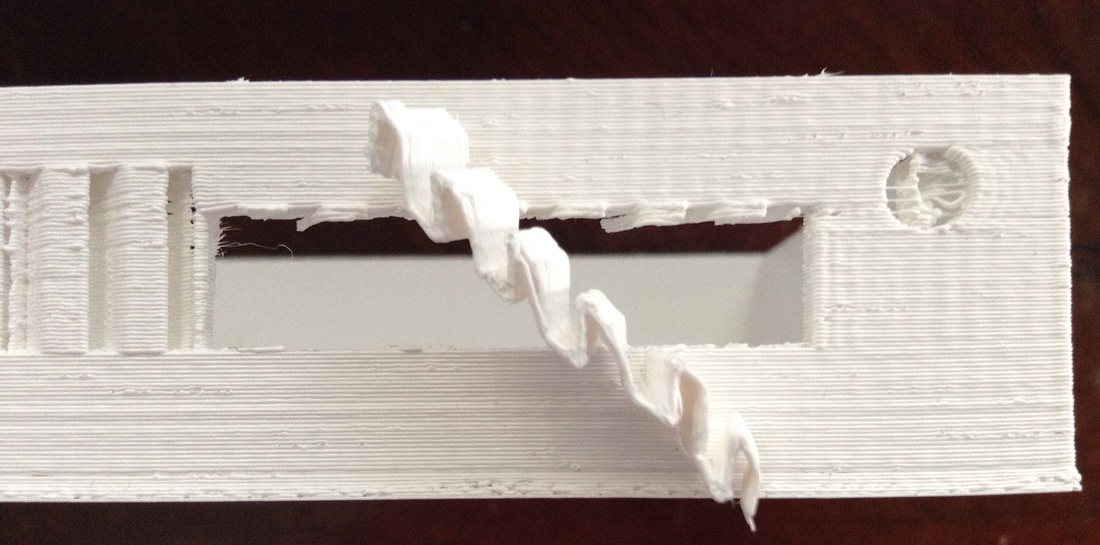
The loss of the test strip though is irritating as it results in prints that have the discolored defect built into the part as seen in the picture below.
Picture
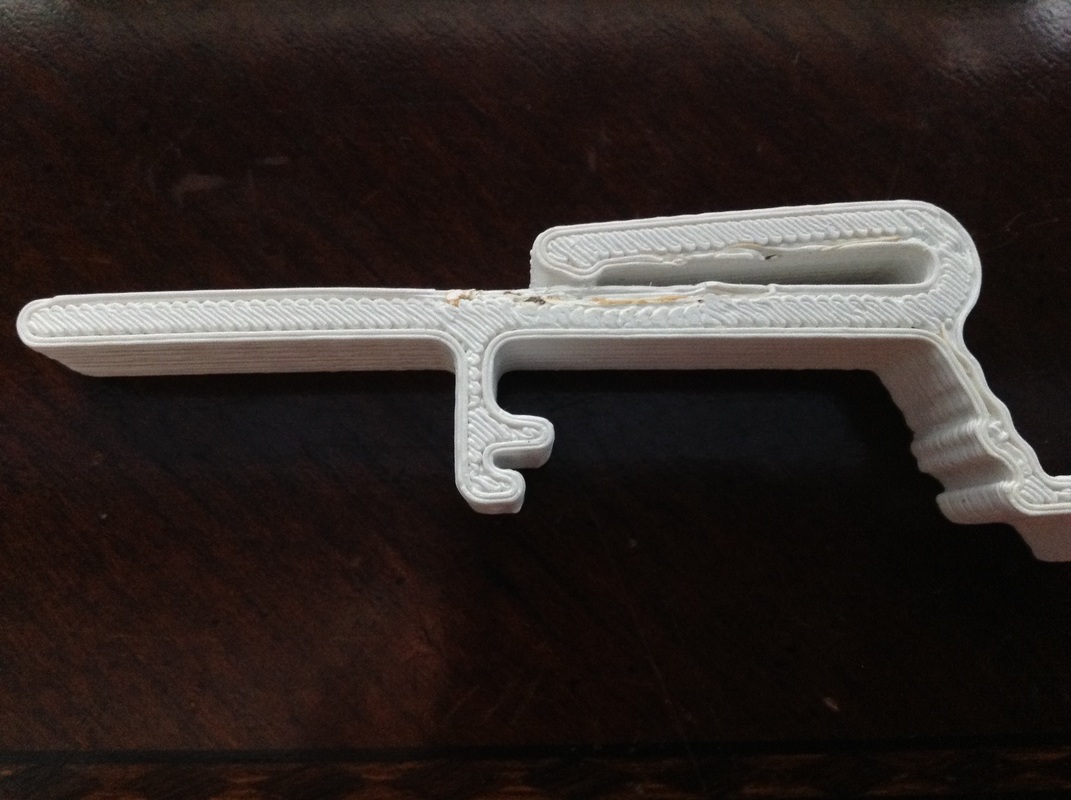
The print actually produces five valence clips and only the first one has the issue with the discolored print. So I sent these pictures to XYZ Printing and hopefully they can help resolve it. Maybe a setting changed that I don't know about is the cause but the software is pretty simple to use and I don't see a setting for test strip.
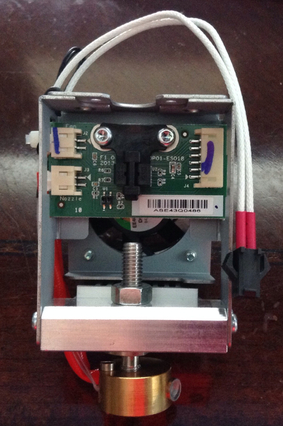
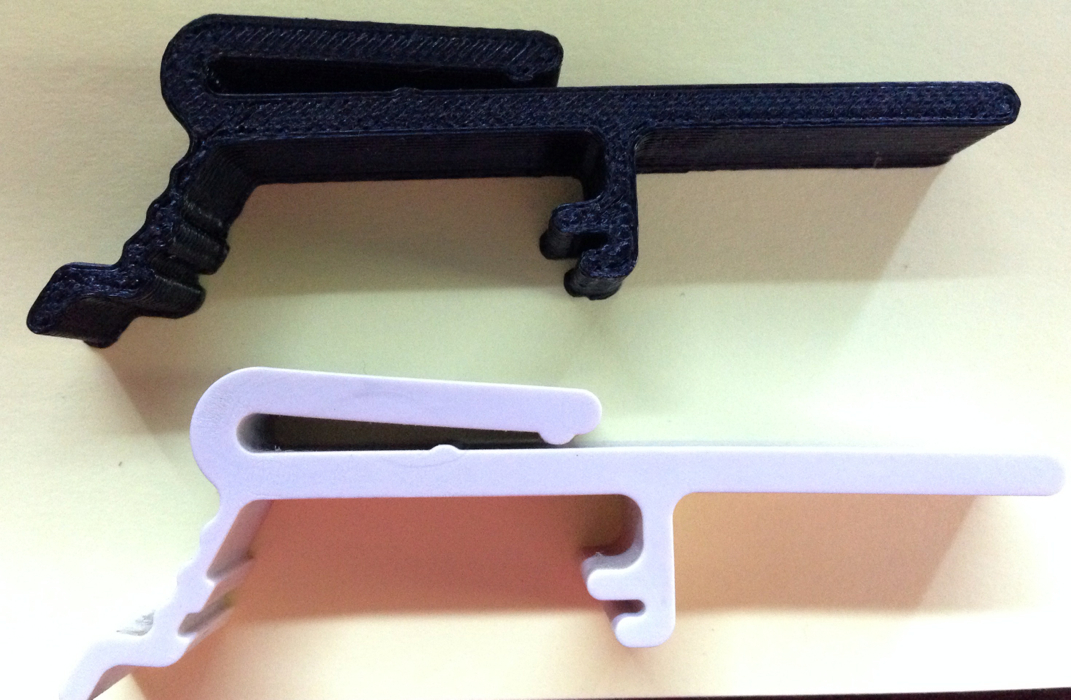
I'm getting very good prints out the printer with the replacement extruder. I like to run them in Excellent mode setting which defaults to 0.2mm height and 30% fill. This seems to result in very good quality prints. 

Below is a video of the Davinci laying down the first layer. You can see the bead just roll out and stick perfectly (other than the first few strips). I believe this is what you want to see after adjusting your heated bed to extruder nozzle clearance. 

I also don't add the suggested stick glue to the platform as the heat of the bed and the heat of the plastic are enough to hold it. Frankly, I find the glue somewhat useless to be honest. The heated of the bed just melts it and the stickiness is limited at that point. A proper set bed seems to do the trick.
2 Comments

New Davinci 3D Extruder Arrived

6/26/2014

1 Comment

 
My new extruder arrived Wednesday the 25th. I shipped the defective unit on the 20th  via priority mail to California so I consider this a quick turn-around. The serial number is different so I believe its a new part or at least a rebuilt unit. I quickly installed it in my Davinci 3D printer and then had it load filament. The display showed it staying at 10 degrees C and no hotter. At first I though maybe my mother board also failed but then I remembered there was another connector (the larger one on the right in the picture) that I forgot to connect. I had to pull the thing apart again and hook up the connector and then everything started working as expected.
Picture
The next step was to run a test print and thats when I found out the mounting bracket I had slightly bent when I was removing the defective unit was not put back in place properly. The extruder tip was way off from the heated platform so plastic was just streaming in the air. 

I stopped the print and bent it back into place and could see the extruder tip lower as I did it. This appears to be a very critical setting yet its easy to bend it. I then decided to run a calibration test, which I could only ever get it to pass once before. Miraculously it passed first time with equal numbers across all three test points +175 each. The target in the documentation is +240 but it showed calibrate success. But I've learned that isn't always worth trusting.

Picture
I ran another test print and this time I printed three small gears from that robot arm I mentioned in a previous post. I positioned them one at a time above the set screws on the platform and then ran the print. The back two gears had the plastic well off the platform and the filament was not sticking at all so I adjusted the base screws at each location as it printed to get the setting I wanted. The front gear made good contact with the base and printed fine so I left that adjustment alone.

Everything appeared to be working good so I stopped the print and then loaded a new file for the vertical blind clip I created and ran that print and it came out nearly perfect. 
Adjusting the base to extruder head is extremely critical. You don't want them too close or the bottom layer will be crushed and spread like peanut butter on bread. You also don't want the gap too large or the filament won't stick. Using the three identical items positioned just above the adjustment screws and then adjust it while it prints seems to work the best.

Overall I'm very happy with the response I got from XYZ Printing. It did cost me shipping to California but that's better than no replacement at all. They were very responsive via email and they shipped the extruder back to me via Fedex so I go it quicker. I can continue to recommend this excellent printer at an unbelieveable price when compared to the competition. 
1 Comment

Davinci 3D Update - Extruder Warranty

6/20/2014

10 Comments

 
It didn't take long to get a response from XYZ Printing (the manufacturers of the Davinci 3D 1.0 printer). I sent an email to the address on the warranty card and within 6 hours had a response. The first response had me check the connectors to make sure they weren't disconnected. They sent a picture to show me what to check. Mine were in place. I even took some voltage measurements at each connector. 0.018 Vdc at the top and 2.22 Vdc at the bottom.
Picture
The next email came the following morning asking me to send them the sales invoice, which I got from Amazon, and also my contact info and shipping address. I suspected I was going to get a replacement extruder but no mention of that yet since they apparently needed to verify I bought it new. I sent the info and then waited another few hours. The next email included their shipping address and asked me to send them the Extruder Nozzle. I was a little confused because to me that sounded like just the brass nozzle so I asked for a picture of what they wanted sent and they sent a picture showing the whole extruder unit. And so the fun began.
Picture
There is a video on the XYZ Printer site that shows how to remove a piece of stuck plastic, which I have already done before but this one had the full line still in place. I tried pulling out the plastic from the top but it wouldn't release because the nozzle was cold. So I pulled the release clip to release the whole extruder and had to fight against the plastic line to get the unit out far enough so I could cut the plastic line. In the process I slightly bent the bracket above the extruder. It was easily put back in place. I cut the line just above the black guide and then the unit came out with a little wiggling. I had then had to cut one tie strap on the heater cable and then disconnect the heater element connector. From there the extruder was out ready to be shipped. 
Now it would have been nice to have the new extruder first so I could just put the new one in while I still knew what needed to be connected. It also would have eliminated half the delay in shipping out and back. I'll also have to remember the steps when the new one comes. I learned a little bit more about the printer in the process though.

On the circuit board is a infrared detector pair (one led and one sensor). This is used to monitor the amount of plastic being used. I'll cover that in more detail in a future post. For now, I'm off to ship the extruder so I can hopefully get my Davinci 3D up and running again real soon.

In the future I also hope they offer parts for sale because after 180 days my warranty is up. It looks like the heater element is just held in place by a set screw. Assuming that is the root of the failure, I could have replaced that for a lot less money. So far though, XYZ has been responsive and helpful. I appreciate the support I'm getting.
10 Comments

Davinci 3D Extruder Failure

6/18/2014

0 Comments

 
I started a 3D print on my Davinci 3D printer last night and went to bed. In the morning I expected the design to be complete. Instead it was half done. The Davinci 3D printer showed the build complete on the LCD but it clearly had stopped issuing plastic half way through the build.

I ran a quick test of the extruder by having it load a new spool which should heat up the head and then start oozing the plastic stream. But the head couldn't get past 22 C or room temperature.
Picture
I read through the warranty card and it says the extruder is covered for 180 days. I bought mine 40 days ago. So I sent the serial number and the details of the failure to the email on the warranty card. I have been building stuff just about every day so its been working fine but now its dead. 

The LCD says it best: "PLEASE WAIT". So now I wait.
0 Comments

Davinci 3D Supports

6/13/2014

0 Comments

 
I printed a case design for the Maximite Computer board and it has some long rectangular holes that needed support on the Davinci 3D printer. The software included with the printer has an option you can select for automatically printing supports to hold up the plastic. Without the supports the plastic sags and the results are not pretty. I learned that the hard way as seen in the picture of the blue box.
Picture
No Supports
Picture
Result from Davinci automatic supports
Picture
Supports fill the holes
Picture
Zig Zag support wall removed
The automatic support prints a zig-zag  wall that is very thin and quite easy to remove. As you can see in the pictures above, the strip pulled out as one piece. What I found though is the walls I designed to stay in place were a bit too thin and two of them broke loose when removing the supports. There should be a post between the VGA connector and the Keyboard connector and then another between the keyboard connector and the black 26 pin. I'll have to re-design that section to make them a little stronger. Rounded corners should help. And since I've learned how to make thin walls that remove easily (even if by accident) I may just design my own supports rather than use the automatic zig zag supports.

I printed this in Good mode not Excellent mode so its rough. Its a 10% fill as well so that affected my posts and the quality of the print. I wanted to get quicker results so I chose the lower quality. This proves once again that printing in Excellent mode setting which defaults to 30% fill is the recommend starting point. 50% fill does a great job for those designs that need that extra fill. This was printed at 0.2 mm height as well.
At least now I have a better understanding of the automatic support feature built into the Davinci 3D software (and you do too). I'm sure it will work great for large over hangs like when making a head statue but for this small area I'll design my own little support posts.
0 Comments

Training Classes Idea

6/10/2014

0 Comments


For years I've considered teaching classes based on my books. And now I'm getting closer to making that a reality. What I'm trying to determine is how much interest there is within my list of blog readers. I'm considering 1 or 2 - four hour classes depending on the topic. Weekend or evening. And in Michigan or Florida or both. Cost would be $100-$150 and would include the book. Hardware (programmer, PIC, components) would be supplied for students to use. Student has to supply the Windows laptop (or Mac with Windows installed).

If you could cast your vote below to give me some feedback, I would appreciate it. Also if you have comments or suggestions for the classes, comment below or send me an message through my contact us page (link at the bottom).

0 Comments

Davinci 3D printed bullet button base

6/9/2014

2 Comments


The resolution of the Davinci 3D printer allowed me to make some custom bullet shell bases for an XBOX controller. This lets you replace the plastic buttons with these unique bullet casing shells and still operate the controller.

Picture

The shells are empty and just needed an insert to hold the bullet shell in-place inside the controller shell. A few measurements of the original buttons and their unique aligned tabs gave me what I needed to create the inserts with TinkerCad software.

Picture
It took a couple prototype runs but all went well. The shells fit tight over the custom inserts and then slide easily into the XBOX controller slots.

Picture

TinkerCad and the Davinci 3D printer work well together. I can produce a prototype in short order with decent precision. I printed these at 0.2 mm height layer and 30% fill. This is the "Excellent" mode in Davinci 3D software setting.

2 Comments

Scanning 3D Objects for Davinci 3D

6/5/2014

0 Comments


XYZprinting just recently announced a combination 3D Printer and Scanner in one unit. It's called the Davici 3D 1.0 Aio or All in one.

Targeting a price of $799 it will allow you to scan a 3D object and then print a copy. It's reported to be available by the end of 2014.

Picture

Speaking of scanning, I had a plastic clip that held a decorative header for vertical blinds in my house that I couldn't find a replacement. They snap in place and I have broke a few over the years. I was down to my last two so I decided to try and 3D print one.

Picture

I considered drawing it in TinkerCad but decided to try a scanning trick I read about. You can scan in a drawing on a paper scanner, and then convert it to a .svg, using one if the many online converters, and then import it into TinkerCad to make it 3D.

So I put the clip on my canon printer/scanner and then converted the scan to .svg and imported it into TinkerCad. The problem was the outline of the clip was solid and the clip was hollow. So I merged it with a solid block and converted the outline of the clip to a hole in TinkerCad thus leaving just the clip in solid. I resized it in the X and Y direction based on measurements of the original clip and then sent the resulting .stl file to my Davinci 3D printer.

My printer was loaded with black plastic so I printed a test unit in black. The picture above shows the results. A perfect copy. It snapped in place and held the decorative piece in place perfectly. So now I can print more in white and make more in the future any time I break one.

And I never had to design it, just scanned it in.

This is awesome. It won't work for every object but this object was the same width top to bottom and was flat on both sides. Who needs a new 3D printer/scanner when I have my paper scanner at home?

0 Comments

    Categories

    All
    3D Printer
    Chipaxe
    Chipino
    Chipkit
    CNC
    Copper Connection
    Dot Matrix
    Elproductsnews
    Expresspcb
    Graphic Lcd
    Great Cow Basic
    Kickstarter
    Lcd Shield
    Makefaire
    Makercase
    Maximite
    Microchip Pic
    Pickit 2
    Pickit 3
    Videos

    Visit previous blog posts in the archives below.

    Archives

    February 2018
    October 2017
    September 2017
    July 2017
    November 2016
    August 2016
    July 2016
    May 2016
    March 2016
    January 2016
    November 2015
    September 2015
    August 2015
    July 2015
    June 2015
    April 2015
    March 2015
    February 2015
    January 2015
    December 2014
    November 2014
    October 2014
    September 2014
    August 2014
    July 2014
    June 2014
    May 2014
    April 2014
    March 2014
    February 2014
    January 2014
    December 2013
    November 2013
    October 2013
    September 2013
    August 2013
    July 2013
    June 2013
    May 2013
    April 2013
    March 2013
    October 2012
    October 2011

    RSS Feed


    About Chuck

    Chuck has been programming with PIC Microcontrollers since there were only five devices. Now there are over 700 and growing. He also has a lot of fun 3D printing designs using his Davinci 3D printer and TinkerCad software. In this series of blog posts and occasional videos on his YouTube Channel he tries to help you get started with electronics and 3D printing.

    Disclaimer

Powered by Create your own unique website with customizable templates.