
I'm slowly getting better at using Inkscape to create laser cut boxes for electronic projects. I've never been a big CAD user but did spend a few weekends learning Sketchup to layout my custom workshop/shed. But for making Laser Cut boxes, it became clear that I had to learn either Corel Draw or Inkscape. And since Inkscape is open source and free, I chose Inkscape to start.
It was not intuitive for me to just start using it. I had to watch a few Youtube videos just to get started. But before long I had the basics down. At first I used it to add features to boxes I created with Makercase but that software kept crashing on my old Mac so I just decided to draw on my own. A friend recommended a tabbed box creator plugin for Inkscape so I tried it out and what a great tip that was.
The plugin is called Boxmaker and you can easily install it by copying the files to the ...\Inkscape\share\extensions folder of your Inkscape install. That's it. Start up Inkscape and its ready to use. This is a great way to get started with a new...
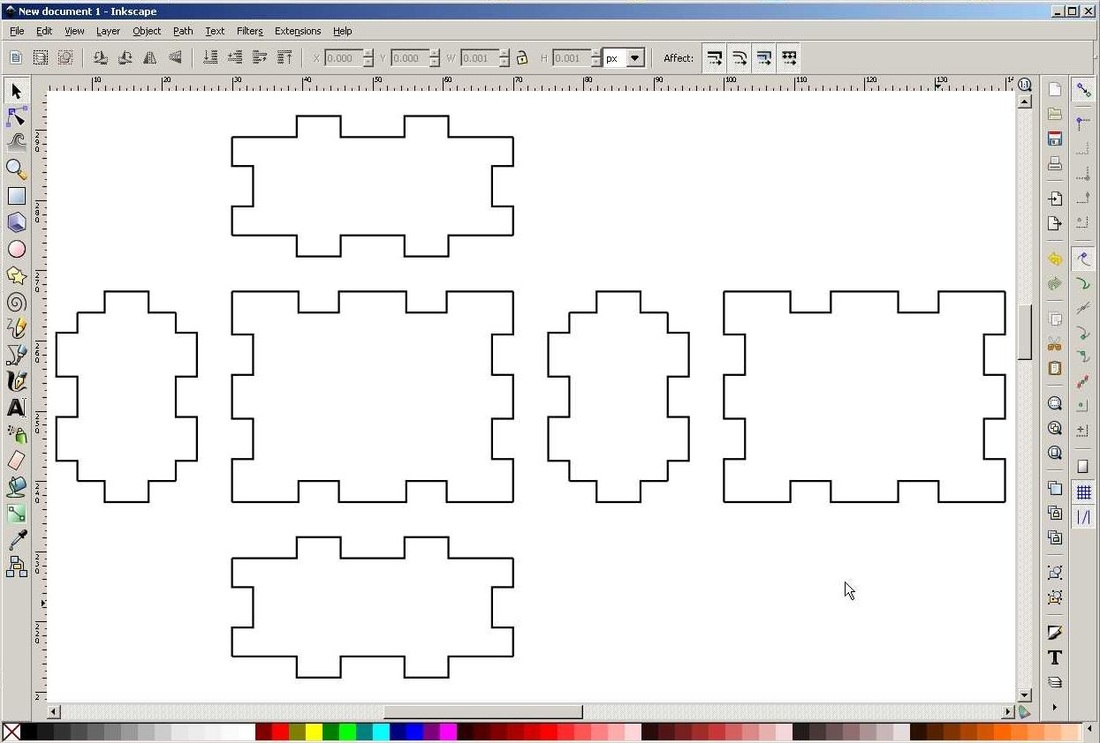 | |
| box design. The interface lets you set the box size from selection windows and then set the tab size. Material thickness is next followed by the kerf, which is the width of the laser cut. You can even select a layout style but you can easily move stuff around once you have it in Inkscape. Just click apply and the design is ready to use and modify. | 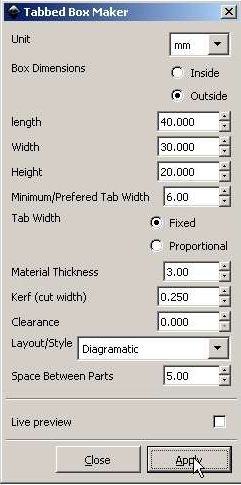 |
I thought about getting a 3D printer but with this setup and access to a local Laser Cutter guy, I'm probably not gonna by a 3D printer for a while yet.
 RSS Feed
