Electronic Products
Find us here:
  • Chuck's Blog
    • Blog Posts Archive
    • Disclaimer
  • YouTube Channel
  • About Chuck
    • About Chuck
    • Stock Car Racing
  • Books
    • Embedded C Books >
      • cbookfiles
      • cbook2files
      • cbook3files
    • BASIC Books >
      • Programming PICs in BASIC_vol1
      • PICBasic Book Support
      • Basic Atom Book Support
    • Other Books >
      • Arduino Book
      • chipkitbookfiles
  • 3D Printing
    • Fabrikator Mini
  • Getting Started with PICs
    • BASIC Programming
    • C Programming >
      • C Compilers
  • Build Your Own PICKit 2
    • PICkit 2 Starter Kit
  • CHIPINO
    • Shields
  • CHIPAXE Breadboard Modules
  • Understanding Hex Files
  • chipKIT
  • Newsletter Archive
  • Contact
  • Retired Designs
    • BasicBoard
    • Ultimate OEM
    • Maximite BasicBox
    • Maximino
  • Downloads
  • Kickstarter Projects
    • Demo-Shield
  • Great Cow Basic Site
  • Buy Hardware
  • Links I Recommend

Davinci 3D Settings for Robot Arm

5/16/2014

0 Comments

 
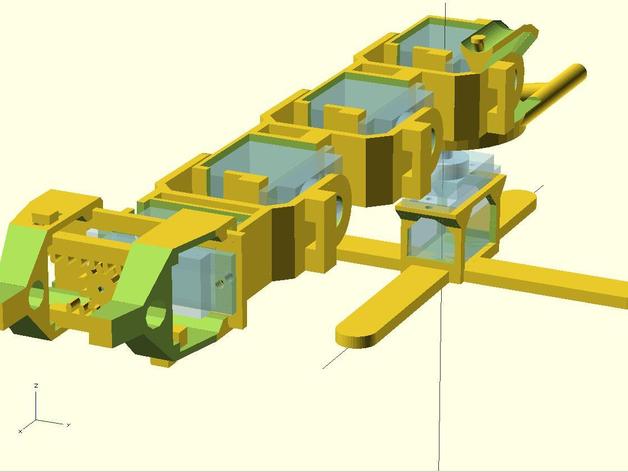
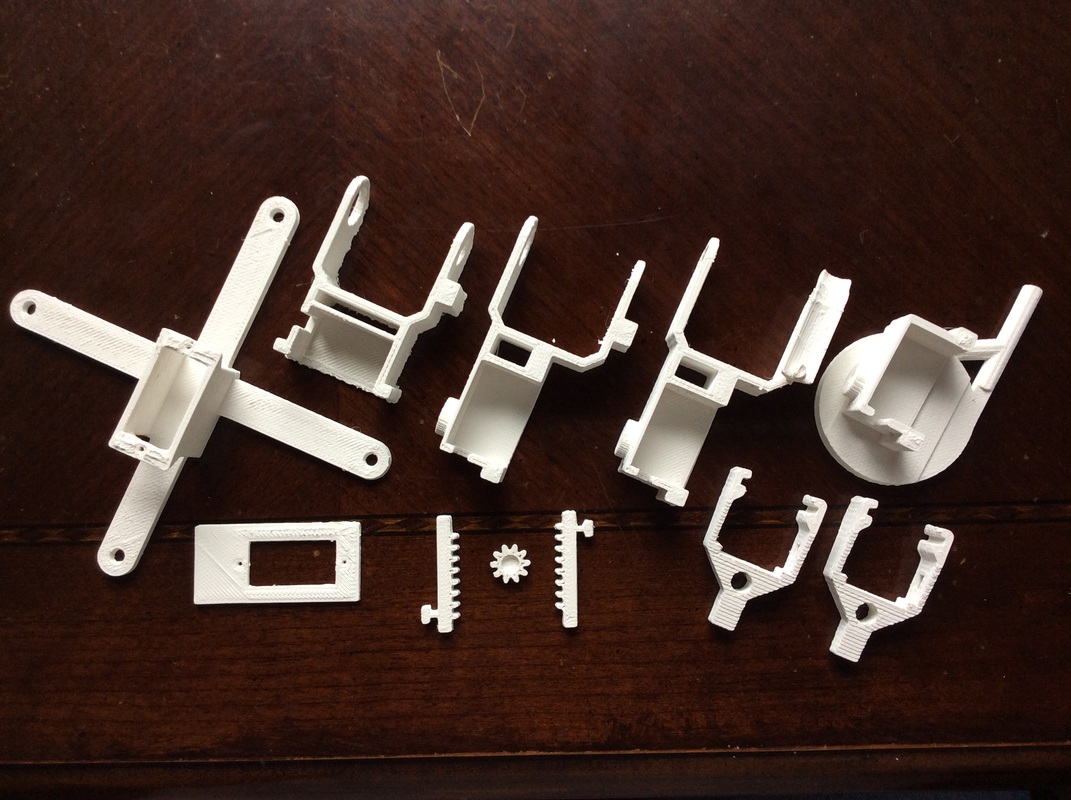
I was searching thingiverse and found a interesting micro robot arm from user Holgero. It uses 9G micro servos so its not real strong but I've been looking for a simple robot arm to control with CHIPINO or Maximite and this looked like a great option. So I printed the components one by one as you can see in the picture to the lower right. I ordered a set of servos from EBAY and as soon as they arrive I can assemble the arm. 
Picture
Picture
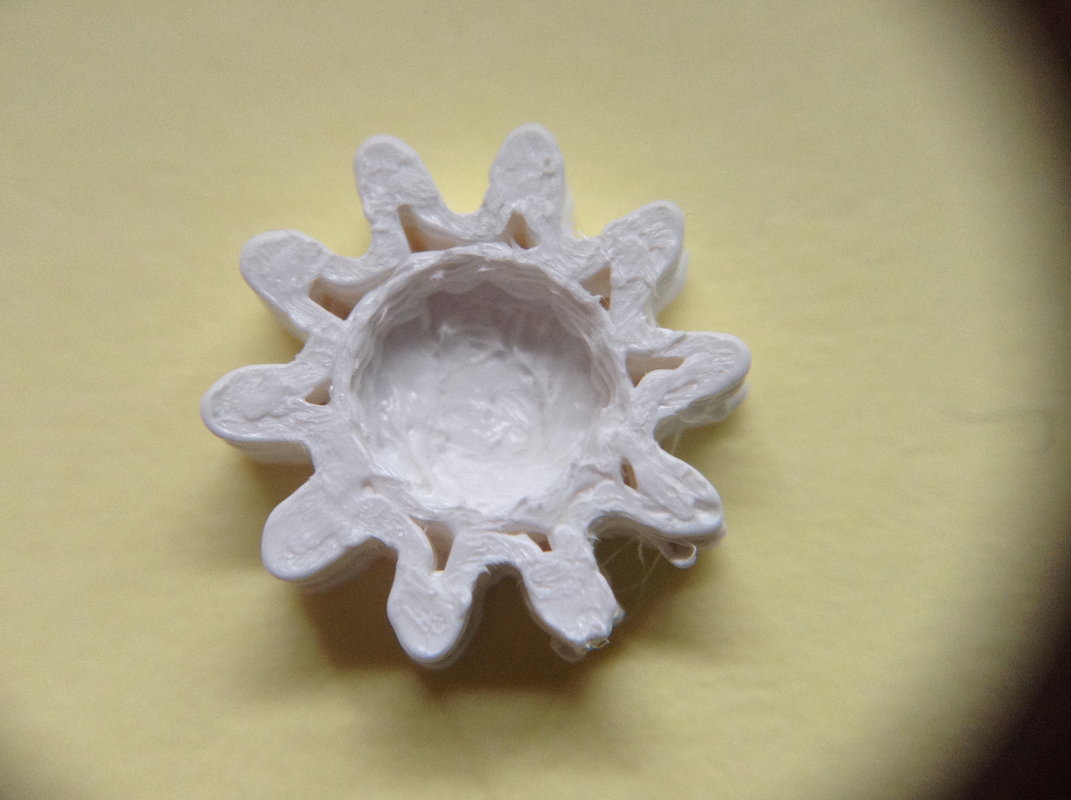
In the process of 3D printing these pieces on the Davinci 3D printer, I found that the "Excellent" setting worked the best. It uses a 0.2 level and 30% fill. A 50% fill is sometimes helpful but that is an advanced setting. The test of this came when I tried to print out the very small gear that drives the arm's gripper. I tried 0.2, 30% (Excellent), 0.2, 50% and 0.1, 50%. They are shown below. 
Picture
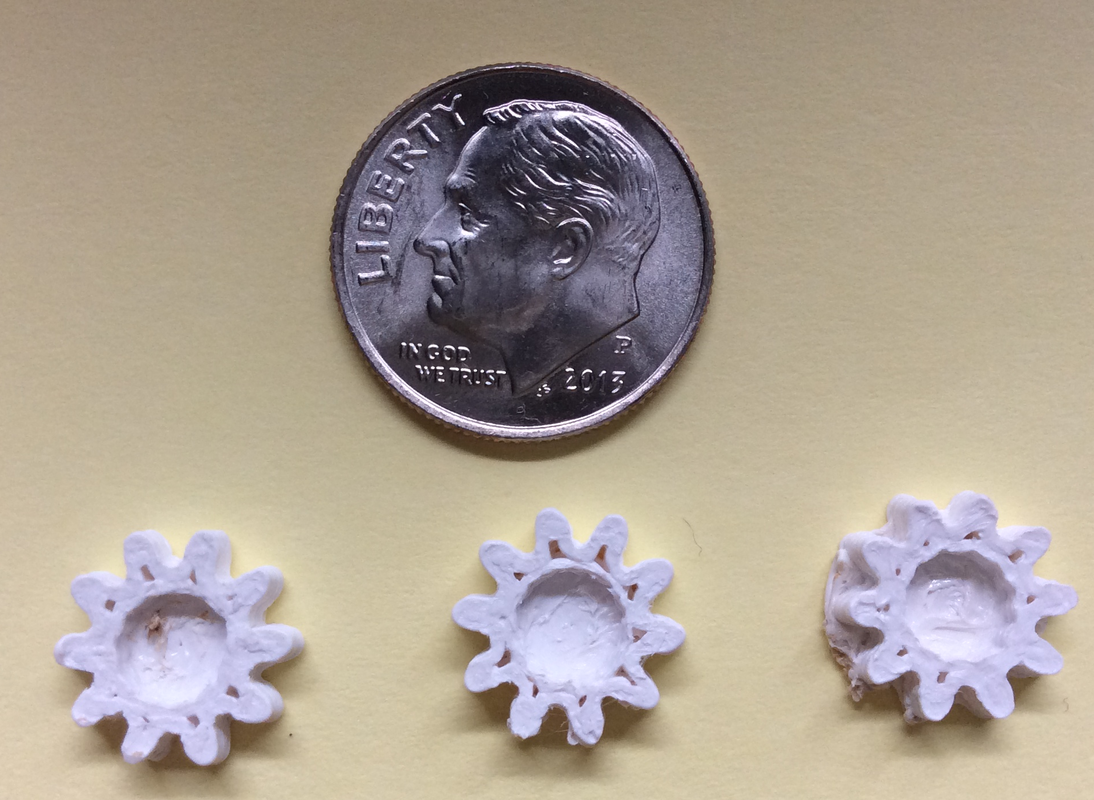
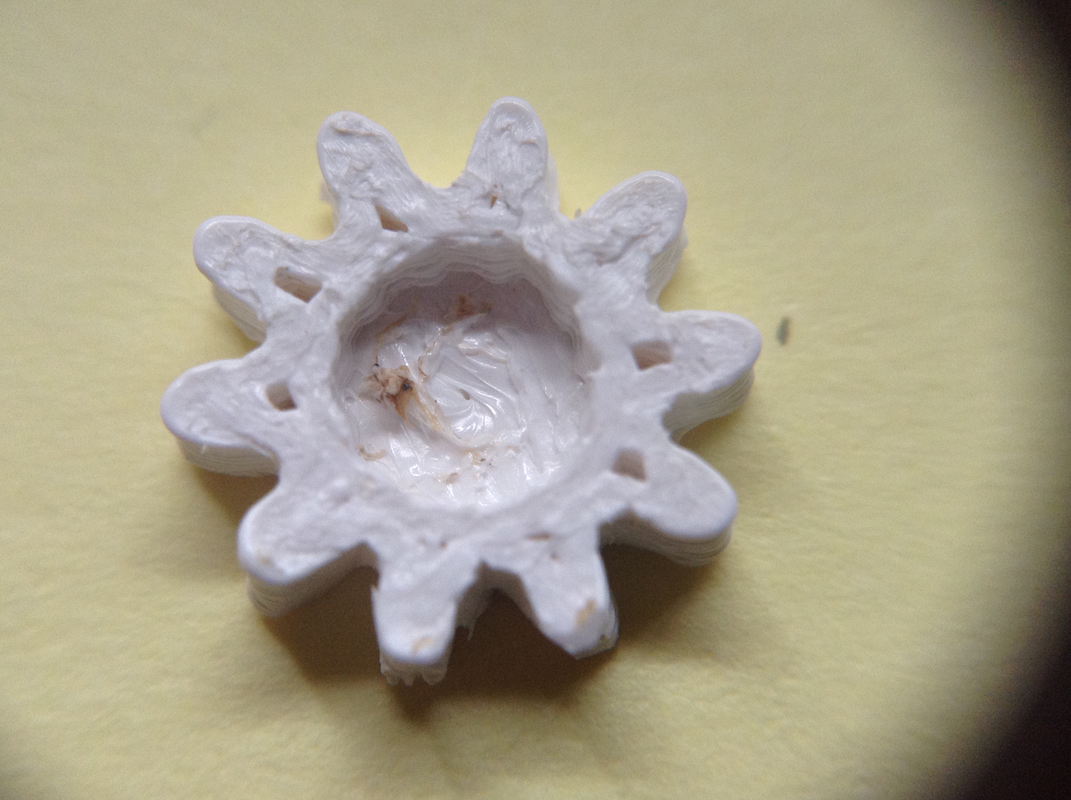
0.2, 50% is on the left. 0.2, 30% is in the middle and 0.1, 50% is on the right. The 1% still needs to be trimmed but it had more stuff to trim than the other two. The 0.2, 30% in the middle should work fine but the 0.2, 50% has a better hole size to fit the servo shaft. There was a hole designed into the center for the servo screw but none of them printed it. Below are close-ups of the 0.2, 30% on the left and 0.2, 50% on the right. The 0.1 just wasn't worth the extra time or material. I frankly am convinced that the Excellent setting is the way to go for most prints.
Picture
Picture
I'm still running off the original cartridge that came with the printer. I've printed a lot of small stuff but I'm still amazed how long it has lasted. It originally said I have 120 m of 120 m max material so that doesn't make much sense since I started with 300 grams of material. But I've printed the whole robot arm and it still says 120 m so I'm not sure its accurate. I'll keep printing until it runs out. I ordered more colors and they arrived yesterday so I'm all set for plastic. Each color is 600 grams so twice as much as I've started with. I may try printing in two color by pausing the print, swapping cartridges and then finish with the second color. I'll see if that will work. I'm also looking at design software. Sketchup is popular but I've played with tinkercad in the past as well so I may try that now that I can actually print the result.

In the near future I want to 3D print a case for my PK2 programmer. That's for another post on another day.
0 Comments


Leave a Reply.

    Sponsors


    Picture
    Picture
    Picture

    Advertise here for only $25 per month. 170x50 pixel add with graphics (similar to Howtronics above). 
    Contact us at our contact form for more detail.

    Categories

    All
    3D Printer
    Chipaxe
    Chipino
    Chipkit
    CNC
    Copper Connection
    Dot Matrix
    Elproductsnews
    Expresspcb
    Graphic Lcd
    Great Cow Basic
    Kickstarter
    Lcd Shield
    Makefaire
    Makercase
    Maximite
    Microchip Pic
    Pickit 2
    Pickit 3
    Videos

    Visit previous blog posts in the archives below.

    Archives

    February 2018
    October 2017
    September 2017
    July 2017
    November 2016
    August 2016
    July 2016
    May 2016
    March 2016
    January 2016
    November 2015
    September 2015
    August 2015
    July 2015
    June 2015
    April 2015
    March 2015
    February 2015
    January 2015
    December 2014
    November 2014
    October 2014
    September 2014
    August 2014
    July 2014
    June 2014
    May 2014
    April 2014
    March 2014
    February 2014
    January 2014
    December 2013
    November 2013
    October 2013
    September 2013
    August 2013
    July 2013
    June 2013
    May 2013
    April 2013
    March 2013
    October 2012
    October 2011

    RSS Feed


    About Chuck

    Chuck has been programming with PIC Microcontrollers since there were only five devices. Now there are over 700 and growing. He also has a lot of fun 3D printing designs using his Davinci 3D printer and TinkerCad software. In this series of blog posts and occasional videos on his YouTube Channel he tries to help you get started with electronics and 3D printing.

    Disclaimer

Powered by Create your own unique website with customizable templates.