
Geoff Graham, the brilliant creator of the Maximite Computer, recently announced a beta release of a Maximite on a chip called MicroMite. He stripped down the MMBASIC interpreter he wrote for the Maximite Computer and fit it on a 28 pin DIP PIC32MX1/2 micro. And you program it with a simple terminal program running on a PC.
He released the .hex file and documentation to those willing to beta test it and I signed up. He suggested a PICkit 3 to load the .hex file into a blank PIC32MX part but I decided to use a Microstick II module. It has a PICkit 3 programmer built in (called the PKOB or PICKIT On Board). It also comes with a PIC32MX250 and USB cable for $34.95.
He released the .hex file and documentation to those willing to beta test it and I signed up. He suggested a PICkit 3 to load the .hex file into a blank PIC32MX part but I decided to use a Microstick II module. It has a PICkit 3 programmer built in (called the PKOB or PICKIT On Board). It also comes with a PIC32MX250 and USB cable for $34.95.
I loaded the .hex file, that Geoff supplied, into MPLAB X and
programmed it into the PIC32MX250F128B without issue. I just had to select the PKOB programmer.
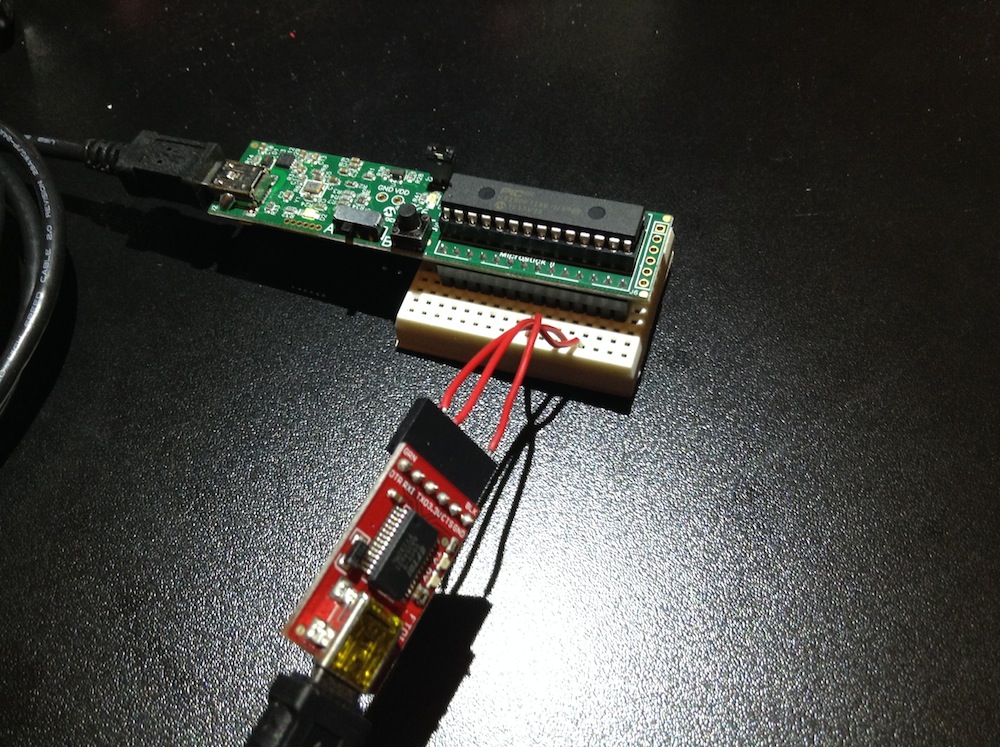
Next I found my USB to TTL serial converter module and hooked it up to the board through a breadboard. The Microstick gets its power from the USB programming cable so I left it hooked up to my laptop. I connected the USB adapter to a second USB port and launched Tera Term.
The > prompt showed up ready for program entry. The Microstick II has an LED connected to pin 2 so I decided to write a short program to flash the LED.
The MicroMite has software inside that launches a full editor screen in the terminal window. So you can write your code just like you would in a text editor like notepad. The editor worked great within Tera Term. I wrote the code to control the LED, which was just about 8 lines of code, and then hit the the F2 function key to save and run the program. The program ran perfectly and the LED began to blink immediately. I had success 1st try. Great job Geoff. I love it when things are designed so well they work first try.
I'm just getting started with it but how interesting is it that you can now program a 28 pin DIP micro in the same code format you could program a VIC 20 or Apple II?
 RSS Feed
