
I finally found some time to build up one of the new PICkit 2 clone boards I had made at ITEAD studio. It was almost a month ago that I posted about receiving the boards. They had been sitting on my desk begging to be tested but I was so busy with other projects, including my latest Kickstarter, that I had to keep putting it off. The good news is the test was successful. The board worked as expected. One minor issue involved the L1 inductor. The spacing was off just a bit so the lead had to be bent back a little. I used a different inductor on the previous design and didn't double check the spacing on the new one. So I'll just adjust it on the next version.
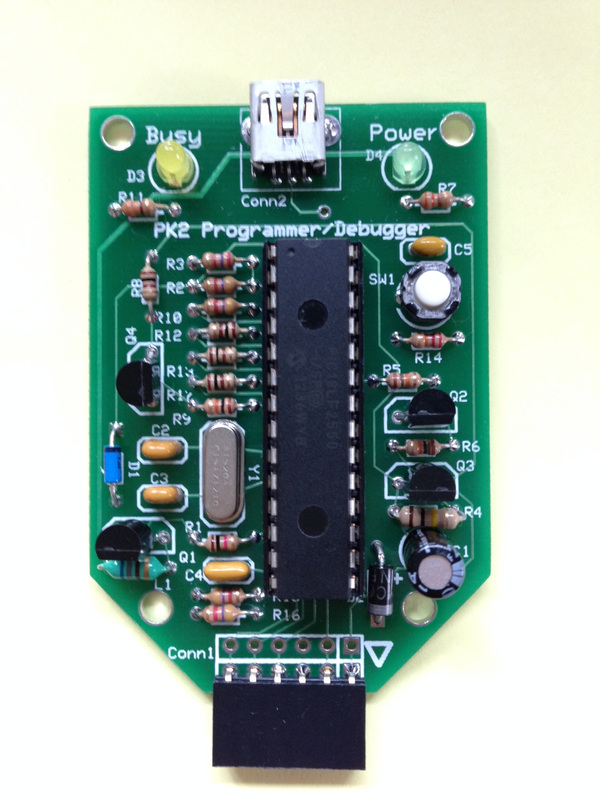
The smaller type B connector is a leaded design rather than the typical surface mount. I used leaded so it could be easily soldered as a kit. But the leads on the connector are so short and so close together I would say its only slightly easier to solder than surface mount. I made the change based on several comments from people that they preferred the smaller connector vs the original larger type A. I made the change but I'm not sure its any better. I'll probably offer both versions on the website so you can choose your own option.
I'd like to design a nice plastic case even if its just a top and bottom with open sides. The biggest hang-up is the 47uf 25v cap. I have searched all over for a low profile version but the shortest I can find is the 11mm tall version without going to a very large diameter. I may have to switch to a tantalum cap but that will be far more expensive which I don't want. If you know of a low profile (7mm or less) with a 5mm diameter, let me know via email. I would appreciate it. With the new lower profile USB connector, the cap stands up like an antenna. I thought about laying it down but there isn't any room on the board for that without moving everything up. So I'll just keep searching.
 RSS Feed
