|
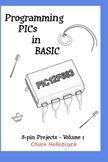
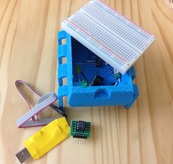
I've been planning a series of videos for my various books and I decided to start with my Programming PICs in BASIC book. This book has been very popular but I do get a lot of questions from beginners. So today I launched the first in a series of videos based on this book. In this one I show you how to setup the software and hardware to get that first project running. The typical blink LED is used as the test project, but when this works that means you have the compiler working, the programmer working and the hardware circuit built properly. That is actually a lot to cover and can be the biggest hurdle for a beginner. Sometimes it helps just to see the steps rather than rely on the description in a book so I put this video together. I used the Large IC breadboard box 3D print to hold the circuit which was a previous video on my channel. The intent is to show how to get started and then I'll follow this up with a video for each chapter in the book in the future. Then I'll tackle my Beginner's Guide to Embedded C series of books after that. I hope you enjoy this one.
0 Comments
Leave a Reply. |
Categories
All
Visit previous blog posts in the archives below.
Archives
February 2018
About ChuckChuck has been programming with PIC Microcontrollers since there were only five devices. Now there are over 700 and growing. He also has a lot of fun 3D printing designs using his Davinci 3D printer and TinkerCad software. In this series of blog posts and occasional videos on his YouTube Channel he tries to help you get started with electronics and 3D printing. Disclaimer |
- Books
- Chuck's Blog
- YouTube Channel
- About Chuck
- 3D Printing
- Getting Started with PICs
- Build Your Own PICKit 2
- CHIPINO
- CHIPAXE Breadboard Modules
- Understanding Hex Files
- chipKIT
- Newsletter Archive
- Contact
- Retired Designs
- Downloads
- Kickstarter Projects
- Great Cow Basic Site
- Buy Hardware
- Links I Recommend


 RSS Feed
