Electronic Products
Find us here:
  • Chuck's Blog
    • Blog Posts Archive
    • Disclaimer
  • YouTube Channel
  • About Chuck
    • About Chuck
    • Stock Car Racing
  • Books
    • Embedded C Books >
      • cbookfiles
      • cbook2files
      • cbook3files
    • BASIC Books >
      • Programming PICs in BASIC_vol1
      • PICBasic Book Support
      • Basic Atom Book Support
    • Other Books >
      • Arduino Book
      • chipkitbookfiles
  • 3D Printing
    • Fabrikator Mini
  • Getting Started with PICs
    • BASIC Programming
    • C Programming >
      • C Compilers
  • Build Your Own PICKit 2
    • PICkit 2 Starter Kit
  • CHIPINO
    • Shields
  • CHIPAXE Breadboard Modules
  • Understanding Hex Files
  • chipKIT
  • Newsletter Archive
  • Contact
  • Retired Designs
    • BasicBoard
    • Ultimate OEM
    • Maximite BasicBox
    • Maximino
  • Downloads
  • Kickstarter Projects
    • Demo-Shield
  • Great Cow Basic Site
  • Buy Hardware
  • Links I Recommend

3D Printed Traffic Light with Electronics

11/20/2015

 
Many times I’m using my 3D printer to make some bracket or box for my lab or one of my projects. But once in a while, it goes the other way and a 3D print inspires a project. That was the case with the 3D print of a traffic light I saw on Thingiverse. It was a design by a Thingiverse user name holgero. I thought the design was interesting and I wondered how well it would print on my Davinci 1.0 3D printer. I also liked the base, which had room for electronics and posts for screwing in the top post that held the traffic light. He designed it to be powered by a USB port but I had other thoughts.
 
Picture
Figure 1
​The traffic light portion was hollow so my plan was to insert an X section inside the design so each traffic light direction had its own compartment for LEDs. This was easy enough with Tinkercad. I imported the .STL file and went to work. I inserted two flat blocks so they formed the X insert.
 
I used the Tinkercad hole feature to make the Traffic Light shell look like an x-ray in Figure 2. This allows you to see the red X piece I inserted into the original design. I’ll change the shell back into a solid object before I produce the .STL file and combine it with the X so it all prints as one solid piece.
Picture
Figure 2
​Tinkercad makes it easy to modify any .STL design but you can’t just edit the original. You have to add plastic or use hole elements to take away plastic. Once everything is brought together as one .STL file then I can send it to the XYZware software that converts it to the G-Code file the 3D Printer needs. This design can be used with any 3D printer.
 
 
Electronics
Once I had the 3D printed parts the way I wanted them, I decided to use Great Cow Basic and a CHIPINO mini module to run twelve LEDs to form a full working traffic light. This could be used as a desk decoration or a functional toy for kids. The CHIPINO mini fit in the base and I thought I could fit some batteries but I later found out I was wrong. It was just too tight.
 
I already had some sample code for a three LED Traffic Light in my book Programming PICs in BASIC so I just modified it for Great Cow Basic and 12 LEDs.
 
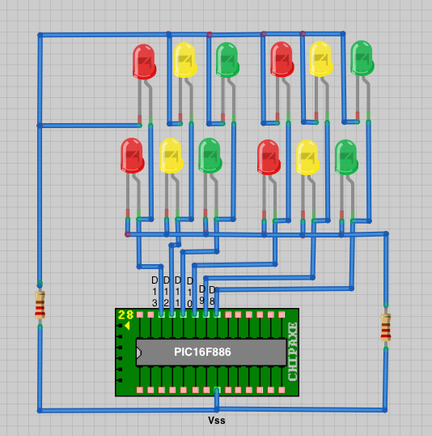
The program is simple as it just rotates through three I/O for Red, Yellow and Green on one direction and a second set of three I/O for the other direction Red, Yellow and Green. The LEDs on opposite sides are connected together, Green-to-Green, Red-to-Red and Yellow-to-Yellow.
 
​Inserting the wire into the channel created by the X insert required 28-gauge wire and a lot of it. The cathodes (ground) for the LEDs on one lane of lights were connected together and through a single resistor because only two LEDs would be on at one time per lane.
 
I printed the traffic light out in white plastic first and wired up a single set of three LEDs just to make sure everything fit. I used hot glue to hold the LEDs in place. Everything worked great so I printed the final version in black plastic but yellow would probably have made more sense. I didn’t have any yellow so black it was.
 

Picture
Figure 3
The base and the shaft printed out and fit perfectly together so then I was ready to run a bunch of wires through the long tube of the post and then into the traffic light head. The result was a lot of wires. You can see them all connected to the CHIPINO mini module in Figure 4.
Picture
Figure 4
​The final design fit together nicely except I didn’t have enough room for batteries so I powered it up through the programming header on the CHIPINO Mini module. Using a 28 pin PIC16F886 was probably overkill but it worked great. As a future improvement, I hope to print a new bottom that is taller and has grooves to hold a couple AA batteries.
 
The final design is shown in Figure 5. It has independently controlled LEDs and is easy to see with the black background. A could of small screws held the shaft unit to the base. I was able to position the programming header into the slot originally designed for the USB connector.
Picture
Figure 5
Picture
Code sample using Great Cow Basic Compiler. (www.greatcowbasic.com).
'traffic.gcb
'A program to create a traffic light
'on Digital pins 8 thru 13 on CHIPINO
 
'Chip model
#chip 16F886, 4
#include <chipino.h> 'Defines CHIPINO setup
 
#define Red D13              ‘RB5
#define Yellow D12        ‘RB4
#define Green D11          ‘RB3
#define Red2 D10           ‘RB2
#define Yellow2 D9        ‘RB1
#define Green2 D8          ‘RB0
 
'Main routine
Start:
 'Red Light
 set Red on             
 set Red2 off          
 set Yellow off       
 set Yellow2 off
 set Green off         
set Green2 on
 
 wait 4 s
 
'Yellow2 Light
 set Red on             
 set Red2 off          
 set Yellow off       
 set Yellow2 on
 set Green off         
 set Green2 off
 
 wait 1 s
 
 'Green Light
 set Red Off
 set Red2 on          
 set Yellow off       
 set Yellow2 off
 set Green on     
 set Green2 off
 
 wait 4 s
 
'Yellow2 Light
 set Red off 
 set Red2 On          
 set Yellow On       
 set Yellow2 off
 set Green off     
 set Green2 off
 
 wait 1 s
 
 'Jump back to the start of the program
 
goto Start
See this project on YouTube.

Fabrikator Mini - 3D Printer under $200

9/11/2015

12 Comments

 
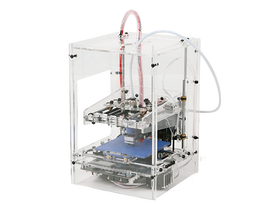
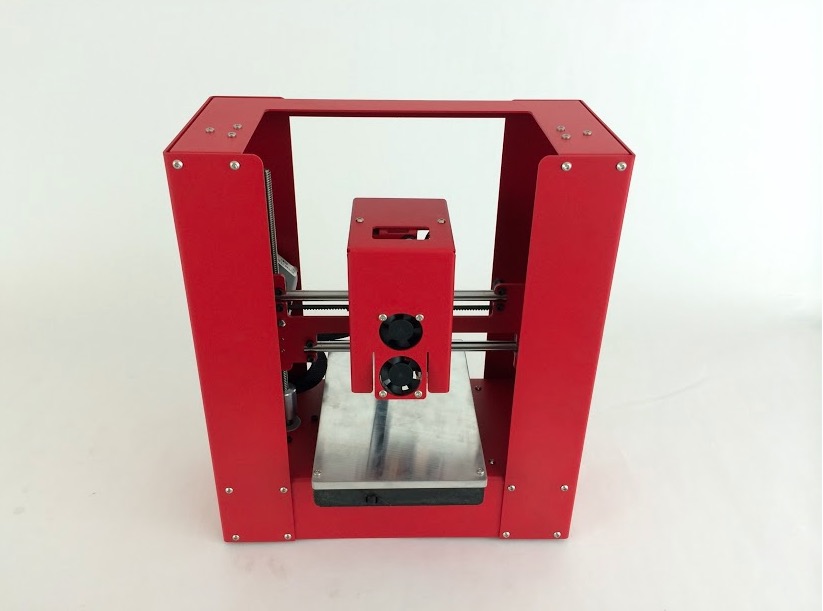
I recently purchased a Fabrikator Mini 3D Printer. It was $179 when I bought it and $192 with shipping. The specs looked perfect for a small 3D printer that I could travel with. There are many times I'm traveling for work and have a difficult time getting my Filament Friday video out for my YouTube Channel. 

This 3D printer is small and only has an 80mm square print area but that works well for many small prints. Plus a print can be broken into smaller pieces and glued together.
 
Picture
For $179 I was shocked that it came fully assembled. Most low cost printers come as a kit and I didn't want a kit. It took a little assembly which was minor, such as connecting the Bowden tube for the filament and hooking up some cables, but that's standard with any printer.

My first prints went really well. They supplied a small amount of black PLA filament and it was just a little short of the plastic required to print the Chess Pawn from my book "Beginner's Guide to 3D Printing". The next steps are to test print with ABS plastic.
My first impressions are, this is a great printer. Especially for such a low cost. In fact, I'm getting better prints from it than I get from my Da Vinci 1.0's which cost a lot more. Stay tuned to here and my YouTube Channel for future updates on this 3D printer.
12 Comments

Reflashing Da Vinci 1.0A with Repetier

8/23/2015

11 Comments

 
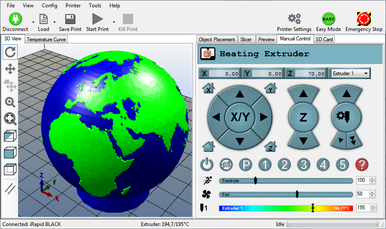
I reached a point in my 3D printing experience where I couldn't put up with the limitations of the Da Vinci printers from XYZprinting. They are so busy trying to prevent people from using other third party filaments that they are now affecting customers who are already buying filament cartridges from XYZprinting. I have never used a resetter and prior to last month had never re-flashed a printer to open source Repetier firmware. It all came to a head when I got a message on my Da Vinci 1.0 that I was using an illegal cartridge (which it was not!) and the software shut down my machine. I had had enough. I reflashed my Da Vinci 1.0A that I bought on EBAY used, and have been printing with open source Repetier control ever since. And I love it.
Picture
XYZprinting, which promoted my channel on their Facebook page didn't like it and quit promoting me. After one full year of videos promoting their product and helping many of their customers get their machines working, they dropped me like a lead balloon. 

I figured that was coming though but I was already upset with their lack of customer support and the way they kept releasing new printers but doing next to nothing to help those that bought prior or releasing new filaments. Plus even the filaments they released required a $100 updated extruder to print PLA (which they falsely advertised it could do). I made the mistake of updating my firmware as they recommended as that let them into my machine to control when they decided it should be shut down. Never again.

My plan now is to shop for a true open source printer and possibly re-flash my other two Da Vinci's or sell them. Re-flashing is easy because they use the Arduino bootloader. The firmware can be flashed as long as you can get a version for the Da Vinci and the open source community released that long ago.

What is really interesting to me is that the XYZprinting company is using a bootloader in the 1.0 and 1.0A that is compatible with the open source Arduino IDE. It implies they are using  open source GPL code in a closed source product they sell. Seems a bit illegal to me but I'm no lawyer. It does give us Da Vinci owners a way out of the closed source control they have tried to place on us so they failed in their attempt to control us. Having said that, I would not buy a newer Da Vinci Jr or any of their future printers based on this and their existing practices of thinking they licensed you the printer rather than selling it to you to own.

So going forward, I cannot recommend their products and am looking for a more open source company to work with me and my YouTube Channel. If there is any open source 3D printing company that wants to work with me, please contact me at my contact page.

For my channel subscribers, it's just gonna get better and better as I expand what I do at my channel, so stay tuned for more.
11 Comments

See Me at 2015 MakerFaire Detroit

7/9/2015

1 Comment

 
Picture
I'll be setup at Maker Faire Detroit once again!
I have been setup at the Faire every year since it started except for last year and I missed it. This gives me a chance to meet some of the readers of my books and this year I'll get to see some of the subscribers to my YouTube Channel. I look forward to that the most. I hope many can make it out to the Faire. 
Picture
This year I'm bringing my 3D printers to the Maker Faire to talk to anybody interested in getting started with 3D printing. I'm sure I'll get all kinds of questions and comments about the Da Vinci's (both good and bad) but I'm ready for the discussion. In the past I focused my booth on electronics but not this year. I'll have some of my books available but other than that the focus will be my YouTube Channel and the 3D printing.
I also plan to bring my Shapeoko CNC just to show it off and some of the projects but I won't be running anything on it. It will be there just for discussion purposes.

I'll be inside the Henry Ford Museum this year. I've been outside in the past and the heat and rain made it horrible so a nice air conditioned booth is fine for me this year. I'm not sure where I'll be positioned so you'll have to search around to find me but that's the fun part of Maker Faire. So many things to see while you search.

I hope to see you there.
1 Comment

Low Cost 3D Printing

6/16/2015

0 Comments

 
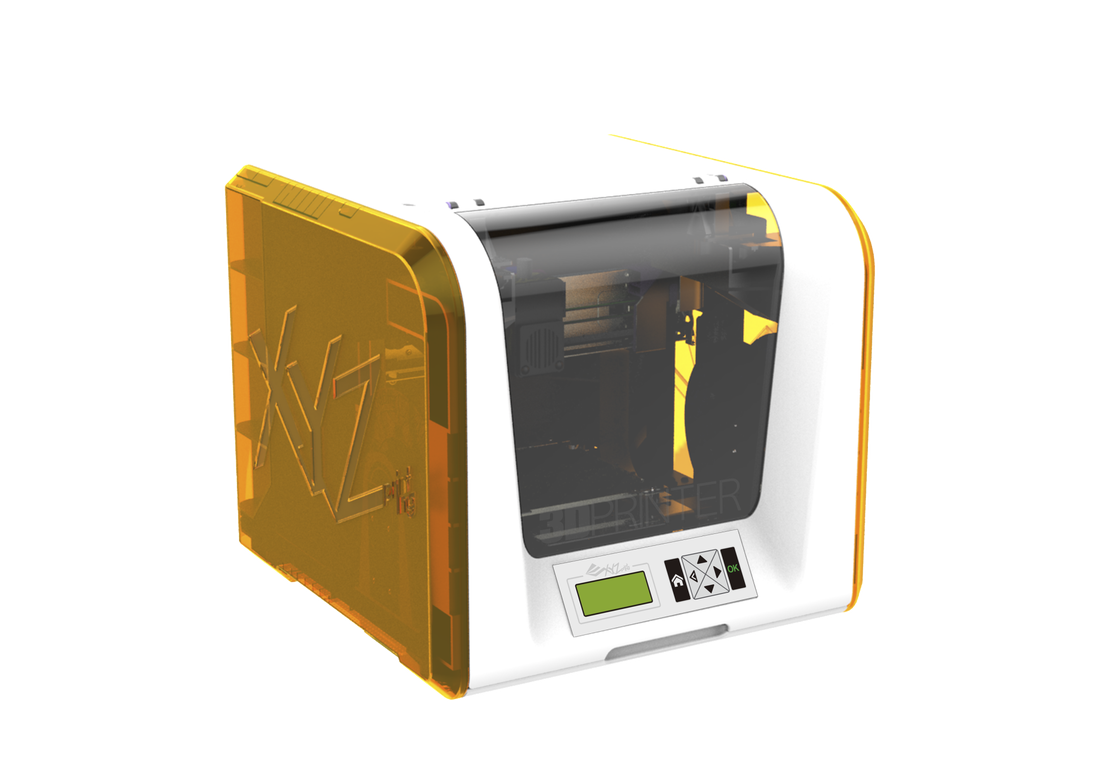
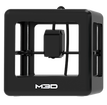
I've been so busy with my YouTube Channel that I've completely neglected this blog. My fascination has been the evolution of the low cost 3D printer. The Da Vinci Jr is now released at $349 and I'll soon have one for 30 days to evaluate. Also Printrbot Play at $399 is now released. The M3D is another Kickstarter success that is now shipping. At $349 its another low cost option.
Picture
Picture
Picture
In all three printers you are mainly looking at printing PLA on a small platform. The M3D claims to print ABS and Nylon as well but without a heated bed that makes me wonder. If that's true, its a great value at $349. 

All three feature a smaller print area. Jr is the largest at just under 6"x6"x6". Simple is slightly over 4"x4"x5" and M3D is basically 4"x4"x4". I have a couple Da Vinci 1.0's that print effectively 7.5" x 7.5" x 7.5" and there are many times I need all that space. But there are enough times where a smaller bed would work fine. 

I mainly print with ABS plastic but recently started using PLA. I've found more choices in plastic with PLA but I like the results with ABS better. It's more flexible, more resistant to temperature, and easily smoothed out or repaired with a little Acetone.

These low cost 3D printers are making "a 3D printer in every home"  more of a reality everyday. I know there are other printers in this low price category in the works as well. So it is still early in the 3D printer evolution and I'm having a lot of fun being part of it.
0 Comments

Beginner's Guide to 3D Printing - Book

4/23/2015

1 Comment

 
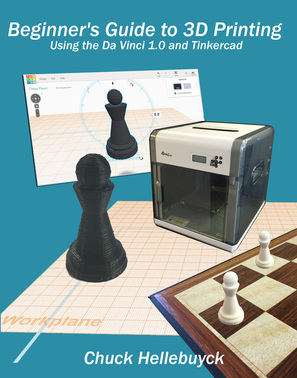
My latest book "Beginner's Guide to 3D Printing" just launched on Kickstarter.
It's a new direction for me so I'm not sure if it will be well received or not. I need the support of Kickstarter to get that first batch of books printed for distribution and determine how much interest there is in this type of book.

Picture
The book takes a reader through the various low cost home 3D Printers and then selects the Da Vinci 1.0. From there the reader is shown how to get that first print going. Then how to create their own with Tinkercad. Then how to get a professional print from Shapeways. Tips and Tricks to make the Da Vinci 1.0 printer even better. It's all in this book. So if you know someone or even yourself that is looking to get into 3D printing and don't know where to start, my book tries to help you through it all.
So please pass it on to your friends, relatives, etc. that the book is released and please help make it a success so more people can learn to have fun 3D printing products an having fun.
1 Comment

Printrbot Play - Low Cost 3D Printer

4/21/2015

0 Comments

 
The people at Printrbot recently announced a new low cost printer. It's called the Printrbot Play. It's targeted at $399 but if history is any indication, that price will rise as all Printrbot 3D printers do. This is an interesting entry though because the sub $500 3D printer seemed like the low point. Now sub $400 seems to be the new line. The new Da Vinci Jr. at $349 seems to be the new low point for a fully assembled ready to user 3D printer.
Picture
The Play is all metal construction but a rather small build area at 100x100x130mm. The Da Vinci Jr at 150x150x150mm is larger. The Play has an aluminum print bed so it doesn't appear to offer a heated bed so I'm not sure if it will only print PLA like the Printrbot Simple, there other low cost metal 3D printer. The Da Vinci Jr. will print PLA only. The Play looks to maintain an open source software control while the Da Vinci Jr. is closed source.
It's clear that 3D Printers are getting both better and cheaper. And kits seem to be fading away with more companies offering fully assembled printers. I like the direction things are going. This gets us closer to a 3D printer in every house. Then the fun can really begin.
0 Comments

Great Cow Basic New Hot Release

4/13/2015

1 Comment

 
For anybody out there looking for a free open source BASIC compiler for PICs, then I highly recommend the Great Cow Basic Compiler. To make things even better, this compiler has been improved about 5000% in the last two years. A small group of individuals have contributed to making it better and I was one of the contributors to the team. There is now a new "Hot Release" available. It's called this because it's not a completely stable released but about as close as you can get without tons more testing.
Picture
I've talked about this compiler before and even created a website dedicated to it. When I created my GreatCowBasic.com website, there wasn't much documentation on the compiler. There wasn't an install facility. Setting a programmer up took a lot of steps. There were several different IDEs for it but none of them endorsed by the team.
Many bugs existed and the documentation was poor. Plus there were many requests for new commands. 

So I attempted to make it easier to use with the CHIPINO module as the hardware. Now the compiler has really grown from where it was. It now supports both PIC and AVR micros. I prefer PIC but now people using a CHIPINO can share code with an Arduino user. The SYNWRITE IDE has been improved and become the standard. The help files have been greatly improved. Tons of sample code are now included. Lots of new features and commands are part of Great Cow Basic.
Despite all these improvements, the simplicity of the compiler has been maintained. You can get access to any of the libraries and modify them if you really want/need to. What I like best is it still produces pure assembly code and I can load that into MPLAB or MPLAB X and debug with professional tools.

It really is a great compiler now and the price of FREE cannot be beat. So if you are just getting started with PICs, I highly recommend you look into this compiler. And if you like what you see, get involved, post to the forum, help find any missed bugs. It's truly a community project but far from a limited effort. It could easily sell for $100 or more based on what it can do but it remains free and completely open source for hobbyist or commercial use. 


1 Comment

Simplify3D Printer Software

3/15/2015

2 Comments

 
Thanks to a subscriber at my YouTube Channel, I now have a version of Simplify3D to evaluate. This is an expensive software package ($150) to control a 3D printer. It doesn't design the print, just slices it and send the generated G-Code to the printer. Its the only 3rd party software that works with the Da Vinci 1.0 3D printer stock software.
Picture
I want to see if it gives me better quality prints and if it allows me to do things I cannot do with the stock Da Vinci software. Simplify3D gives you far more control of the print. You can set the heat of the print at different layers. You can slow down or speed up the print at different times. You can change the fill at different points in the print. The biggest advantage is you can control where supports for added or removed for sections of the print that may hang over and fall if not supported.
I'm just getting started with the software so it will take me time to learn it. There is a lot to learn. I hope to do some videos on the software in the future so if you are interested in that, stay tuned to my YouTube Channel. I also like the fact that it will work with many different printers. This allows me to jump to a different printer in the future if I need to and not have to learn new software. That is a nice feature.
2 Comments

Great Cow Basic Update

2/23/2015

0 Comments

 
I've been using the Great Cow Basic compiler for Microchip PICs for many years. Probably around 15 years now. I was never a heavy user and in the early days it was a bit limited and difficult to use. That was then and today it's a totally different story. There have been many great contributors to this open source compiler and the creator Hugh Considine is still behind the scenes making improvements. A new version is close to release and hopefully by the time you read this you will see an update dated with a February or March 2015 release.
The compiler has expanded to support both PIC and AVR microcontrollers. A full featured IDE is now available and works great. There have been many new commands added and improved documentation. One thing that was missing in the past was a library of sample code and now that is available too. 
Picture
Evan Venn, a top contributor, worked closely with Hugh and with some key forum members, to expand the compiler and sample code and commands to make it on par with any BASIC compiler out there. 

What I like the best is it produces a pure assembly code file. This allows me to see the core libraries and how they work. It allows me to load the assembly file into MPLAB and run debug mode or on the simulator without any special changes to the file or any special setup requirements. In fact MPLAB doesn't know a BASIC compiler created it. It thinks its a raw assembly code file.
So I suggest you give it another look. I created a separate website at greatcowbasic.com to help make it easier for a beginner to get started but I need to really update that site. The main Great Cow Basic site is a sourceforge website that has improved over time. So give it another look and let me know what you think?
My guess you'll want to try it out.
0 Comments
<<Previous
Forward>>

    Sponsors


    Picture
    Picture
    Picture

    Advertise here for only $25 per month. 170x50 pixel add with graphics (similar to Howtronics above). 
    Contact us at our contact form for more detail.

    Categories

    All
    3D Printer
    Chipaxe
    Chipino
    Chipkit
    CNC
    Copper Connection
    Dot Matrix
    Elproductsnews
    Expresspcb
    Graphic Lcd
    Great Cow Basic
    Kickstarter
    Lcd Shield
    Makefaire
    Makercase
    Maximite
    Microchip Pic
    Pickit 2
    Pickit 3
    Videos

    Visit previous blog posts in the archives below.

    Archives

    February 2018
    October 2017
    September 2017
    July 2017
    November 2016
    August 2016
    July 2016
    May 2016
    March 2016
    January 2016
    November 2015
    September 2015
    August 2015
    July 2015
    June 2015
    April 2015
    March 2015
    February 2015
    January 2015
    December 2014
    November 2014
    October 2014
    September 2014
    August 2014
    July 2014
    June 2014
    May 2014
    April 2014
    March 2014
    February 2014
    January 2014
    December 2013
    November 2013
    October 2013
    September 2013
    August 2013
    July 2013
    June 2013
    May 2013
    April 2013
    March 2013
    October 2012
    October 2011

    RSS Feed


    About Chuck

    Chuck has been programming with PIC Microcontrollers since there were only five devices. Now there are over 700 and growing. He also has a lot of fun 3D printing designs using his Davinci 3D printer and TinkerCad software. In this series of blog posts and occasional videos on his YouTube Channel he tries to help you get started with electronics and 3D printing.

    Disclaimer

Powered by Create your own unique website with customizable templates.